|
|
Timline of photography development 900AD-Alhazan made the first ever Camera Obscura.
1500-AD renaissance Camera Obscura made in the 1500 hundreds. 1452-1519 Leonardo Da Vicni he used the Camera Obscura to help him draw. 1724-Johann Heinrich Schultz managed to temporarily capture shadows. 1826-Joseph Nicephore niepce took the first photo 1833-Louis Daguerre learnt how to make photos 1833- The first Daguerreotype was made 1840-Henry Fox Talbot knew how to capture pictures 1871-Richard Leach Maddox 1871- Richard Leach Maddox made the Gelatin Dry Plate 1877- Edward Muybridge and the Galloping Horses 1882-Edward Muybridge who made the Galloping Horses 1885- George Eastman he made film 1885- George Eastman rolled fiim was invented 1925-Leica Camera and Oskar Barnak made the first digital camera 1975- Steve Sasson made the first portable camera |
Camera Obscura
The Camera Obscurer is a dark room or space in which an inverted image is put on the surface.During the Renaissance, Artist became increasingly interested in exploring and representing the reality of nature. Artist such as Leonardo David Vinci developed various technique to assist them in their quest for=perfect perspective, the Camera Obscurer was one of them. Davinci used this method to introduce 3d scenes to a flat plane so they can coppy perspectives.
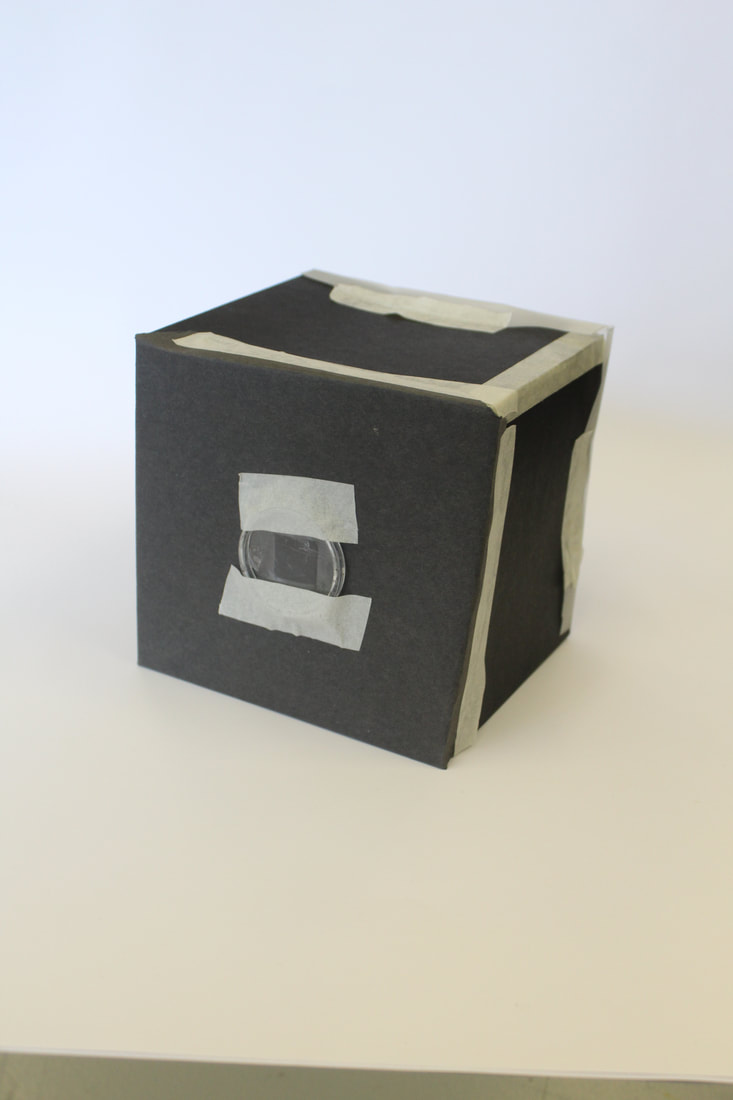
How I made the Camera Obscurer
- First you neatly fold the black card in half, then half again.
- Then you need to sellotape the ends together so it’s light tight, it should look like a square.
- Then you get a piece of tracing paper and fold it on its one centimeter mark and do it for the other three sides.
- After, you cut out the loose ends and put it around your box.
- Then make an aperture in the card.
- Next you shape the black sugar paper into a cylinder, where you stick over the aperture and put a magnifying glass on top, acting as a lens .
- When the light hits the magnifying glass it focuses on the landscape and an inverted image is then produced on the tracing paper.
DSLR guide
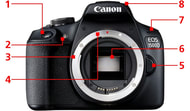
1) The shutter button. Press that button to take the photo.
2) Red eye reduction self-timer lamp. It lights up when using built in flash.
3) The lens mount. This is the section that connects the interchangeable lens.
4) Lens mount Index. You need to align the marks on the lens with this mark.
5) Lens release button detaches the lens.
6) Mirror, the mirror is unique it reflects your image.
7) Microphone is a thing on the camera which uses sound.
8) Built in flash is when you use a flash to use dimly lit photos.
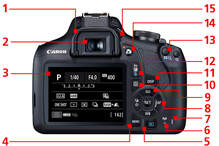
- 1) The eyecup prevents external light from entering into the lens.
3) The LCD monitor displays the captured image and any text.
4) The menu button is used for adjusting different camera functions.
5) Play back button-This is the button for playing back images you have taken.
6) Wifi lamp-This lamp shows the wireless connection.
7) Access lamp- The lamp appears blinking when there is data is moving between the camera and the memory card.
8) The Multi-controller keys are directional buttons that allow you to do multiple things with your camera.
9) ISO Speed Setting Button-Press this button to adjust the sensitivity of the camera light modes.
10) Quick Control Button-Pressing this button shows the Quick Control screen.
11) Display Button-by pressing the button, it shows all the different functions on your camera.
12) Erase Button-Use this button to erase unwanted images.
13) Focus Button Selection Button-Use this button to go into AF point.
14) Live View Shooting/Movie Shooting Switch-Use this button to turn on or turn off the Live View function.
15) Dioptric adjustment knob-Use this knob to adjust the clarity of the image.
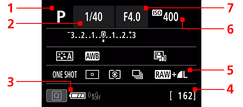
1)Shooting Mode -Displays the text or icon to the shooting mode you have chosen.
2) Shutter speed-Displays the time during which the shutter is open.
3) Battery Level-Displays the remaining battery level.
4) Shots Remaining-Indicates the number of remaining shots that can be taken.
5) Image Recording Format/Quality-the image-recording quality
6) ISO Speed-A higher ISO speed makes it easier to capture shots of a dimly-lit scenes.
7) Aperture Value-This value shows how open the aperture blades inside the lens are open.
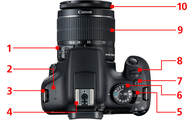
1) Focus Mode Switch-Use this switch to set the focusing mode to Automatic (AF) or Manual (MF).
2) Speaker-Audio sound of a recorded movie can be played back through the speaker.
3) Strap Mount- It helps the person taking the photo hold the camera.
4) Hot Shoe- This is used to attach external flash unit.
5) Power Switch-Use this switch to power on or power off the camera.
6) Mode Dial-Turn this dial to select a shooting mode.
7) Flash Button-Use this button to pop up the built-in flash.
8) Main Dial- it can be used to adjust multiple settings.
9) Zoom Ring-It is used to alter focal length.
10) Focus Ring- It is used to adjust the focus.
Shutter Speed
Shutter Speed is responsible for changing the exposure and the way movement is portrayed in the photo. The higher the shutter speed, since it is a very fast shutter speed there is less light can get in if the shutter opens and closes quickly.
If you have a low shutter speed, movement is captured like a blur. As the shutter is open longer there is more light in your images.
If you have a low shutter speed, movement is captured like a blur. As the shutter is open longer there is more light in your images.

Fast shtter speed 1/320

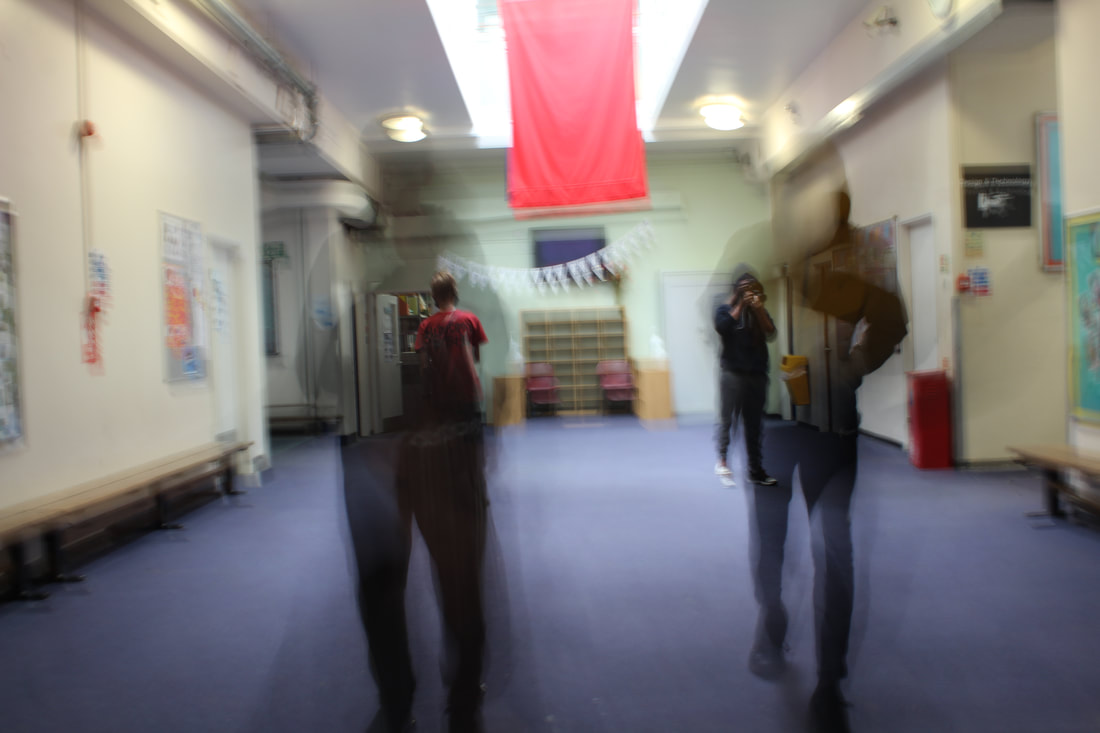
Slow shutter speed 5seconds
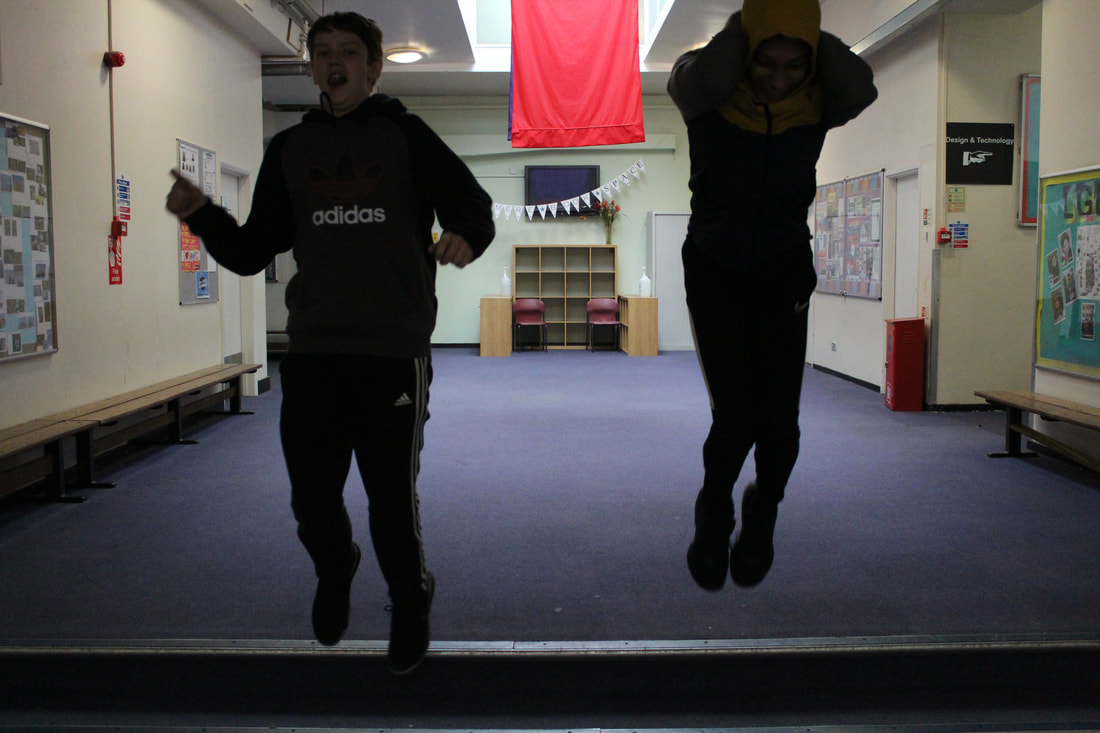
In this task i was required to change my shutter speed to captrue movement. As you can see with the fast shutter speed images, the subjects are in focus but the images are under exposed, due to less light going inside the lense.
The two images that the subjects are a blur is when I used a slow shutter speed and the images are brighter.
WWW: by varing the shutter speed it is usefal for caputring different of the ladscape for example water falls.
The two images that the subjects are a blur is when I used a slow shutter speed and the images are brighter.
WWW: by varing the shutter speed it is usefal for caputring different of the ladscape for example water falls.
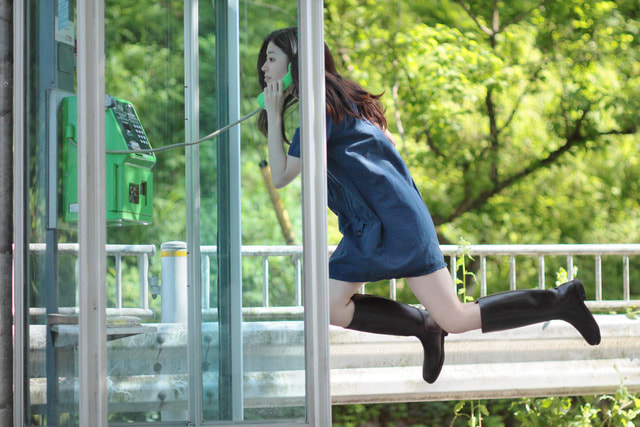
Natsumi Hayash Levating

|

|

|
|
Natsumi Hayash makes of a selection of photos off her levating
In this activity I wanted to create an opitical illusion to show my models levitation like Natsumi Hayash does.
When I took these pictures I set my shutter speed high 1/400, in order to make it look more like they were levitating. I had to set the ISO on automatic, as the subjects were in the shade and therefore needed the images to be more brighter. The thing that I could of done better was varying the position i took the photos and getting better with my timing. I think what i did well was how i captured him while he was floating in the air. Next time I would add props
My home photos
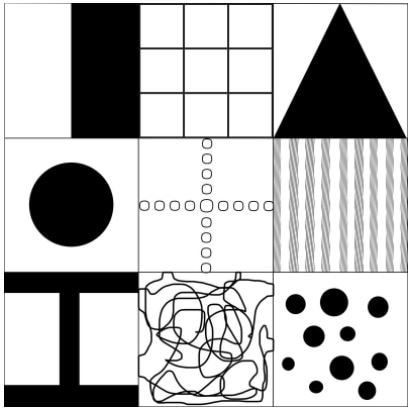
composition |


|
|
|


Francesca Woodman


In the photo Road Island Francesca Woodman intended to show someone who had died, this is shown by her collapsing to the floor. The low shutter speed makes the picture more terrifying and goulish making it look more real. This also may have an emotional connection towards Francesca Woodman becuase she commited suicide at the age of 27, therefore the picture may be displaying her feelings and warning us on her impending suicide.
Francesca Woodman's photos were very still looking very real. However, mine was quite shaky therefore if I could do anything better I would certainly use a tripod. As well as id ask the modle to keep one part of thier bodt still and make slower movement.
The part of the photo that I believed was the best was making it look like Isaac had half disappear making him look like a ghost.
Aperture
Aperture is the hole in the lens that lets light into the camera. Aperture is measured in f stops. A large F number (F/22) means less light for a large depth of feild . A small aperture(F/2.8) means there is more light going through therfore we have a shallow depth of feild.


|
Apeture 5.6
shutter speed1/4 iso=1600 |
aperture=22
shutter speed= 1/500 iso= 800 |
WWW: the focus on the first person is clear and the people in the bakc ground are bluryy giving a good shallow depth of feild.
EBI: next time with the smaller apeture use a higher shutter speed so the image is shaky.
EBI: next time with the smaller apeture use a higher shutter speed so the image is shaky.
The rules of thirds


In photography, the rule of thirds is a type of composition in which an image is divided evenly into thirds, both horizontally and vertically, the subject of the image is placed at the intersection of those dividing lines, or along one of the lines itself.
www: I Like the way it gives the photogrpah different dimensions
ebi: the bit I could improve on is take photographs of a different theme and applying ru;le of thirds on a verticle image.
www: I Like the way it gives the photogrpah different dimensions
ebi: the bit I could improve on is take photographs of a different theme and applying ru;le of thirds on a verticle image.
GIF